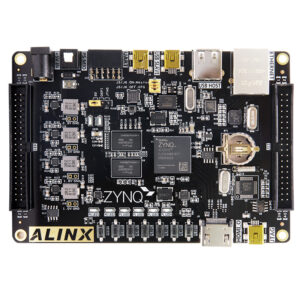
Here, we will create a “Hello Snickerdoodle” project using Xilinx Vivado Software Development Kit.
Note: From the Xilinx software version 2019.2 or higher, the Software Development Kit (SDK) is embedded into the all-in-one Vitis Unified Platform.
Downloading Xilinx SDK
The Software Development Kit is downloaded from the official Xilinx website, and the “Vivado Design Suite 2019.1” includes the Software Development Kit (SDK).
Download Link:
Installing Xilinx SDK
Step 1: Creating a directory in” /opt” for installation.
Command:
sudo mkdir /opt/Xilinx
sudo chmod -R 777 /opt/Xilinx
Example Image:

Step 2: Running Xilinx Setup
cd ~/Downloads/Xilinx_Vivado_SDK_2019.1_0524_1430/
./xsetup
Example Image:
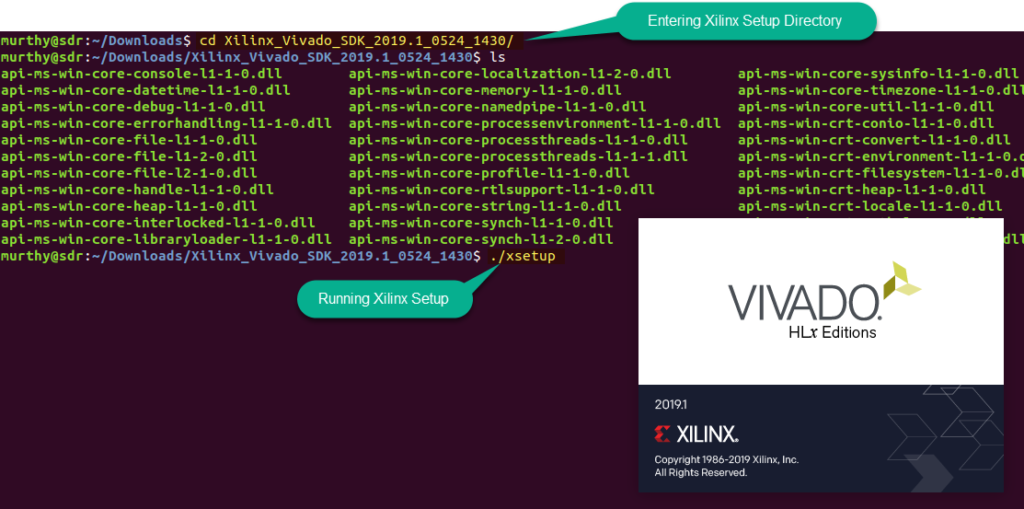
Step 3: Executing the Installation.
- From this step on-wards, the GUI interface is supported to run down the vivado installation process.
- Selecting the “Vivado System Edition” in the product selection window will install Vivado and SDK.
- Point the installation location to “/opt/Xilinx”, and proceed the installation.
Example Image:


Creating Hello Snickerdoodle Project using Xilinx SDK 2019.1
Step 4: Creating an Application Project using Xilinx Software Development Kit.
Open Xilinx Software Development Kit (SDK) and in the “Eclipse Launcher” select the workspace location and then click on File 

Example Image:


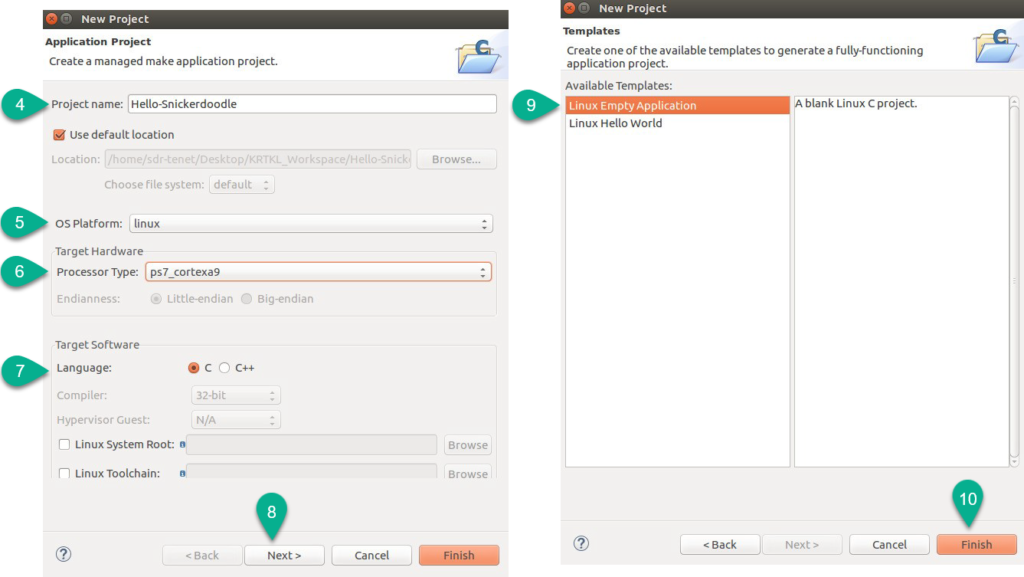
Step 5: Customising application project.
- Give the Project Name, select the OS Platform, Processor Type, Target Language and then click on Next.
- Then select “Linux Empty Application” and click on Finish.
Example Image:
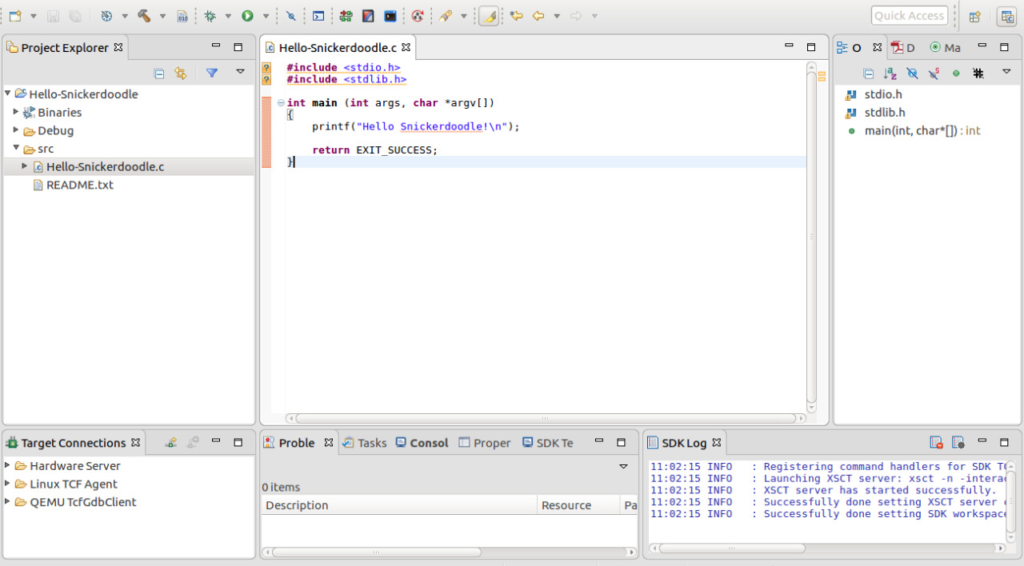
Step 6: Creating new source file and writing “Hello Snickerdoodle!” code in c.
- Right Click on “src” folder and then go to New
File, then give the file name and click on Finish.
- Now, in the SDK work area write the code and save it.
- After saving the project click on Project
Build.
Example Image:

Step 7: Exporting the developed project to the snickerdoodle board.
- Here, we have physically connected the “Snickerdoodle One” board to a windows pc and wirelessly connected from ubuntu linux.
- First, connect to the snickerdoodle Wi-Fi access point from the “Ubuntu Network Settings“.
- Now, access the snickerdoodle via SSH and provide access permissions to the location “/usr/bin” present inside the snickerdoodle board and then exit the connection.
- Next, reconnect to the host and copy the “Hello Snickerdoodle.elf” file from the workspace to the snickerdoodle’s “/usr/bin” directory.
Note: Use the access point address which is configured in the “config.txt” file.
Example Image:

Command:
ssh admin@10.10.100.2
sudo chmod -R 777 /usr/bin
exit
Example Image:

Command:
scp Desktop/KRTKL_Workspace/Hello-Snickerdoodle/Debug/Hello-Snickerdoodle.elf admin@10.10.100.2:/usr/bin/Hello-Snickerdoodle
Example Image:

Step 8: Booting “Snickerdoodle One” and running “Hello-Snickerdoodle” project.
- Now run PuTTy on the windows pc.
- Select the desired serial line, and set the baud rate and then click on Open.
- Here, we have selected COM4 at 115200 rate.
- Now, the snickerdoodle will boot up and ask for login credentials.
- Login to snickerdoodle’s ubuntu linux environment and type “Hello-Snickerdoodle”.
- Now, the “Hello-Snickerdoodle.elf” will be executed, which will display “Hello Snickerdoodle!” on the serial console.
Example Image:


For details, contact: info@tenettech.com

