NVIDIA Jetson Nano Developer Kit is a small, powerful computer module which allows running multiple neural networks related applications like image classification, object detection, segmentation, and speech processing. Since Nano Jetson operates with just a minimal power supply of 5 to 10 Watts this makes it possible to achieve a small low power Artificial intelligence system which can be used to develop varying applications spanning across domains like IOT, AI enabled smart systems .etc.
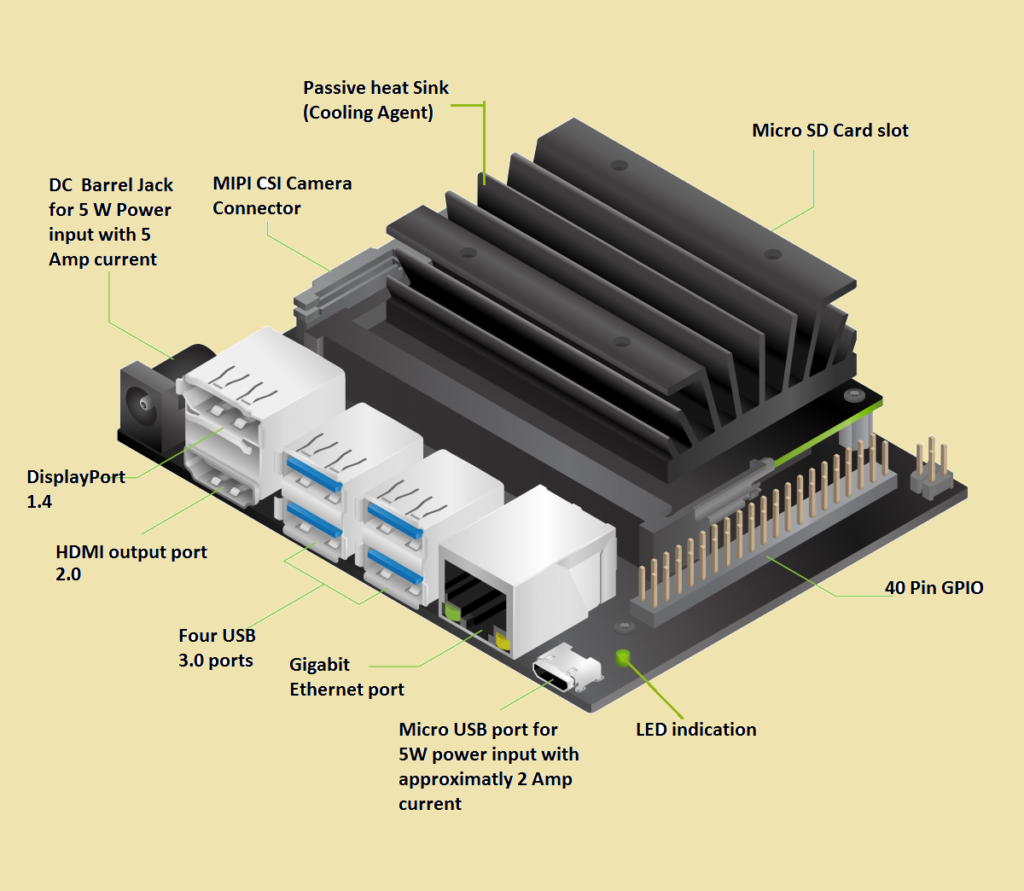
Specification:
- Architecture : 69 mm x 45 mm, 260-pin edge connector
- Power Consumption : 5 to 10 Watts
- Display Port :
• High definition Multimedia Interface (HDMI 2.0)
• Display Port (DP 1.4) - USB Connection : 4 X USB 3.0
- MIPI CSI Camera connector (CSI-2)
Where
• MIPI stands for Mobile Industry Processor Interface Alliance
• CSI stands for Camera serial connector - Power Supply Port:
• Micro USB port for 5V and 2 Amp current
• DC Barrel Jack for 5 V and 5 Amp current - 40 Pin Expansion header (GPIO Pins)
- Memory : 4 GB with 64 bit LPDDR4 25.6 Gb/s
- GPU : 128 – Core Maxwell generation
- CPU : Quad core ARM A57 processor @ 1.43 GHz
- Storage : microSD Card ( Minimum 16 GB)
- 1 x Gigabit Ethernet, M.2 Key E
- Video Encode : 4K @ 30 | 4x 1080p @ 30 | 9x 720p @ 30 (H.264/H.265)
- Video Decode : 4K @ 60 | 2x 4K @ 30 | 8x 1080p @ 30 | 18x 720p @ 30 (H.264/H.265)
Getting Started with NVIDIA Nano Jetson
In order to get started with NVIDIA Nano Jetson, we need to first download the image and flash the image on the MicroSD card with atleast 16GB memory space.
The link is attached bellow. Follow the link bellow to download the image
https://developer.nvidia.com/embedded/learn/get-started-jetson-nano-devkit#write
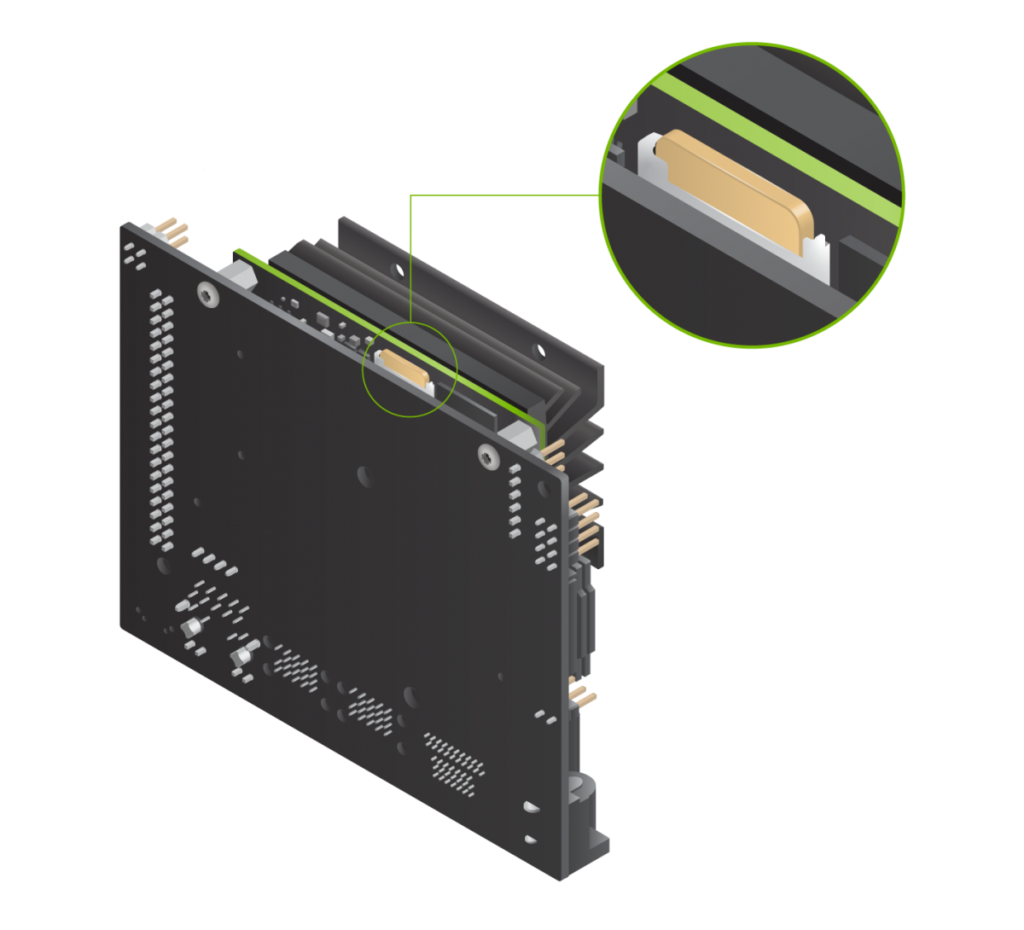
Once the image is downloaded, based on the operating system install the Etcher based on the operating system (namely Windows, Linux, and Mac). With the help of Etcher, flash the image on the SD Card and place it in the slot as shown below:
Interface the board with the host system including Monitor , Keyboard, mouse , Wi-Fi dongle or Ethernet cable for internet access and power supply based on the application ( for 2 Amp current prefer micro USB cable wire and for 5Amp current prefer DC Barrel jack ).

For DC Barrel jack, kindly make sure to put a jumper on the pins as shown below for the connectivity.

A green LED next to the Micro-USB connector will light as soon as the developer kit powers on. When you boot the first time, the Jetson Nano Developer Kit will take you through some initial setup, including:
• Review and accept NVIDIA Jetson software EULA
• Select system language, keyboard layout, and time zone
• Create username, password, and computer name
After logging, you shall see the screen displayed as shown below:

Stay Tuned to look at the series of the Jetson Nano blog series to learn more as to what can be done on these platforms !


